

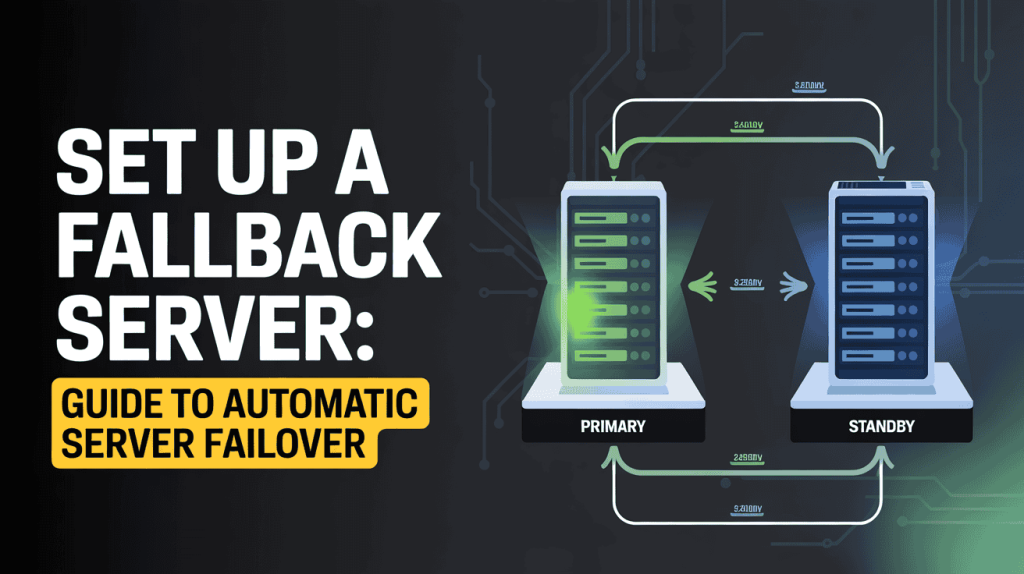
These days, everyone is online. Keeping your services running all the time is super important. If your service goes down, you can lose money, trust, and your reputation. To stop this from happening, you need to use a fallback server. This guide will show you exactly how to set up a fallback server. We’ll help you get a perfect automatic server failover, which makes your whole system much stronger. A good server failover setup relies on a good fallback server.
A fallback server is just a backup system that’s waiting to take over if your main server breaks. This smooth switch is called server failover. This server failover process keeps you from having downtime and makes sure your business keeps going. This fallback server is like a safety net for your important stuff. Now more than ever, it’s key to know how to use a fallback server to get a good server failover plan. This server failover strategy is just so important.
This guide will explain all the parts you need to build your fallback server. We’ll talk about what computers you need, how to set up the software, and how to connect everything. We’ll also show you the best ways to test your server failover system. You have to test your server failover setup to know your fallback server will work. When you’re done, you’ll know how to use this server failover to stop problems from outages and keep your business safe. This is why a fallback server is a great tool for server failover.
What is a Fallback Server?
A fallback server is a backup server that’s on standby, ready to take over if your main server fails.
Think of it like a backup generator for a hospital. The hospital runs on the main power grid (your primary server). If the power goes out, the backup generator (the fallback server) automatically kicks in so the lights and machines stay on.

In web hosting, your primary server runs your website. If it crashes, breaks, or gets disconnected, the system automatically redirects all your website traffic to the fallback server. This quick switch is called “failover.” The goal is for this to happen so fast that visitors to your site don’t even notice a problem.
Importance of Fallback Servers in Web Hosting
Fallback servers are critical in web hosting because they ensure your website stays online, even when things go wrong. This is often called “high availability.”
Here’s why this is so important:
- Minimizes Costly Downtime: Every minute your website is offline, you can lose sales, ad revenue, and new customers. A fallback server keeps your site running, protecting your income.
- Protects Your Brand Reputation: A website that is fast and always available looks professional and trustworthy. If your site is frequently down, visitors get frustrated and will go to your competitors.
- Allows for Seamless Maintenance: You can take your main server offline on purpose to perform important updates, security patches, or hardware upgrades. During this time, you can direct all your visitors to the fallback server. Your users won’t notice any downtime, and you can do your maintenance without rushing.
- Provides Disaster Recovery: Sometimes, big problems happen that are out of your control, like a power outage at the data center, a hardware failure, or a flood. A fallback server (especially one in a different physical location) ensures your website can survive even a major disaster.
In short, a fallback server is the essential safety net that keeps your website online and your business running, even when things go wrong.
How Automatic Server Fallback Works :
The magic behind an automatic server fallback is a clever process of constant monitoring and instant switching.
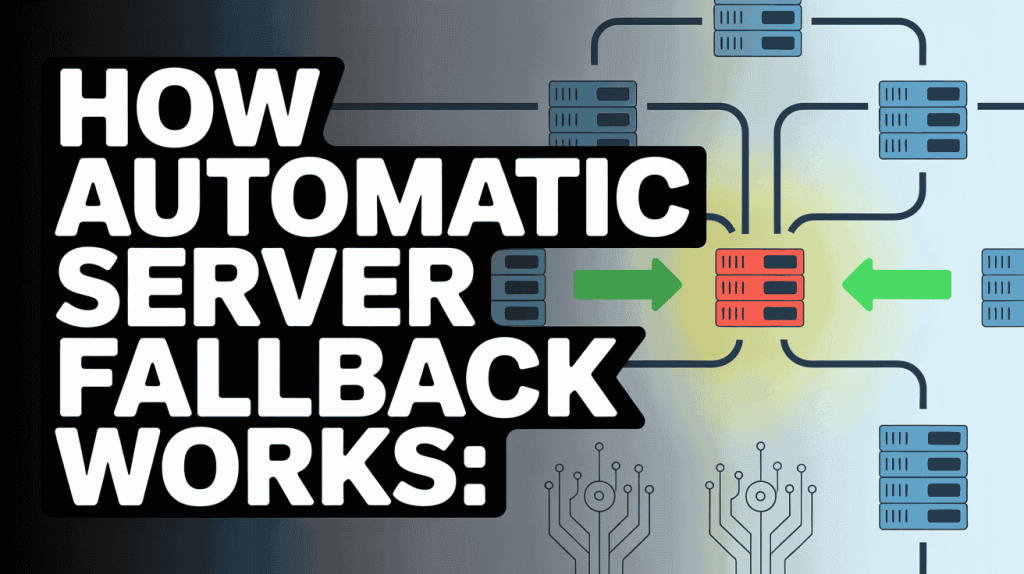
The Mechanism Behind Automatic Failover :
Automatic server failover works by using a system of constant monitoring. The most common method is called a “heartbeat.”
Think of it this way: your main server (Server A) and your fallback server (Server B) are connected.
- The Heartbeat: Server A constantly sends a tiny signal, or “heartbeat,” to a monitoring system (or directly to Server B). This signal repeats every few seconds and essentially says, “I’m alive! I’m alive!”
- Detection: The monitor “listens” for this heartbeat. If the heartbeat signal suddenly stops, the monitor doesn’t take action immediately. It waits for a pre-set amount of time (e.g., 5-10 seconds) to make sure it wasn’t just a temporary network blip.
- The Switch (Failover): If the heartbeat is still missing after that time, the monitor officially declares Server A “down.” It then automatically triggers the failover.
This “switch” is the most important part. It’s often handled by a system called a Load Balancer or a Floating IP.
- Floating IP: Imagine your website’s address (IP address) is a signpost that points to Server A. During a failover, the system automatically moves that signpost to point to Server B. All new visitors are now sent to the healthy fallback server, and they never even know there was a problem.
- Load Balancer: A load balancer acts like a traffic cop, directing visitors to the right server. When it sees that Server A is “unhealthy” (no heartbeat), it simply stops sending any traffic to it and sends 100% of the traffic to Server B instead.
Types of Server Failover Techniques :
There are two main ways to set up your fallback servers, each with its own pros and cons.
1. Active-Passive (Hot-Standby) :
This is the most common and straightforward method.
- How it works: You have one “Active” server (your main server) that handles 100% of the work. You also have a “Passive” server (your fallback server) that is on, running, and ready, but it doesn’t do any work. It just sits there, monitoring the active server and waiting for it to fail.
- The Failover: When the active server fails, the passive server “wakes up” and becomes the new active server, taking over all the traffic.
- Pro: Simple to manage.
- Con: You are paying for a backup server that isn’t being used 99.9% of the time, which can feel like a waste of resources.
2. Active-Active :
This is a more advanced and efficient method.
- How it works: You have two (or more) “Active” servers, and they both handle the work all the time. A load balancer splits the website traffic between them. For example, it might send 50% of visitors to Server A and 50% to Server B.
- The Failover: If Server A fails, the load balancer simply stops sending traffic to it and directs 1.00% of the traffic to Server B. Server B was already “warmed up” and working, so the transition is instant.
- Pro: Very fast failover and you use 100% of the server resources you are paying for.
- Con: This is more complex to set up, as you have to make sure both servers can access the same data (like a shared database) at the same time without conflicts.
Key Benefits of Implementing a Fallback Server :
Implementing a fallback server provides several critical advantages that protect your business, your customers, and your revenue.
Here are the main benefits:
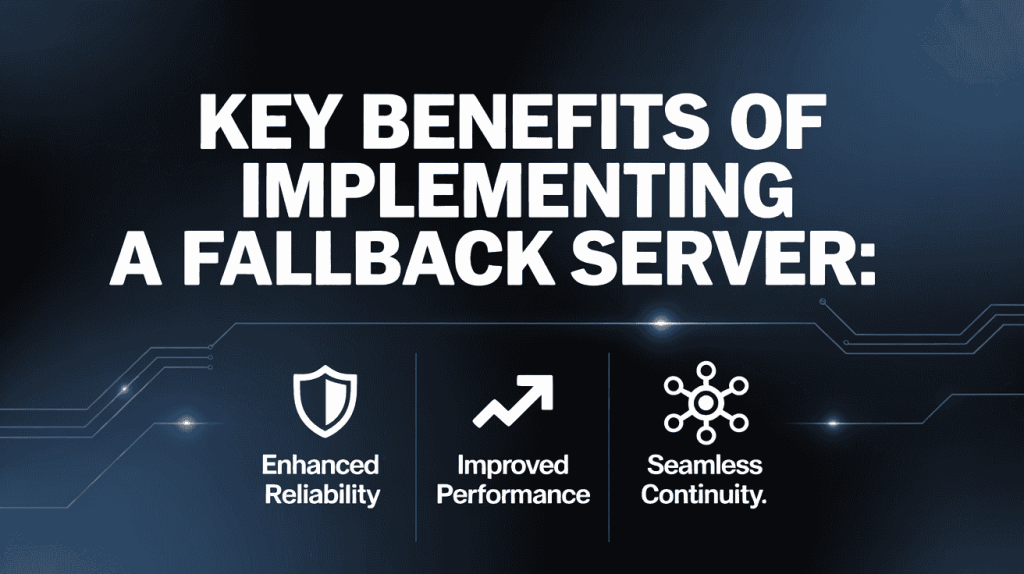
- Ensures High Availability (Minimizes Downtime) : This is the biggest benefit. A fallback server takes over instantly when the primary server fails, keeping your website or service online 24/7. This continuous operation is often called “high availability.”
- Protects Revenue : For any business online, downtime is lost money. If you run an e-commerce store, a fallback server ensures customers can always check out. If you run a blog or service, it ensures you are still earning ad revenue or subscription fees.
- Safeguards Brand Reputation and Customer Trust : A website that is fast and always working looks professional and reliable. If your site is frequently “down for maintenance” or just broken, users get frustrated and will go to your competitors. A fallback server makes you look dependable.
- Allows for Seamless, Zero-Downtime Maintenance : Servers need to be updated, patched, and sometimes even replaced. A fallback server allows you to perform this essential maintenance without taking your website offline. You can manually switch traffic to the fallback server, do your work on the main server, and then switch back when you’re ready—all without your visitors even noticing.
- Provides Critical Disaster Recovery : Sometimes, a whole data center can go offline due to a fire, flood, or massive power outage. If your fallback server is located in a different physical location (geographically redundant), your service can survive even a major disaster.
- Improves the Overall User Experience : Ultimately, all these points lead to a better and more stable experience for your users. They can access your service when they want to, which keeps them happy and more likely to return.
In summary, a fallback server provides essential peace of mind, ensuring your online presence is protected, professional, and always available for your users.
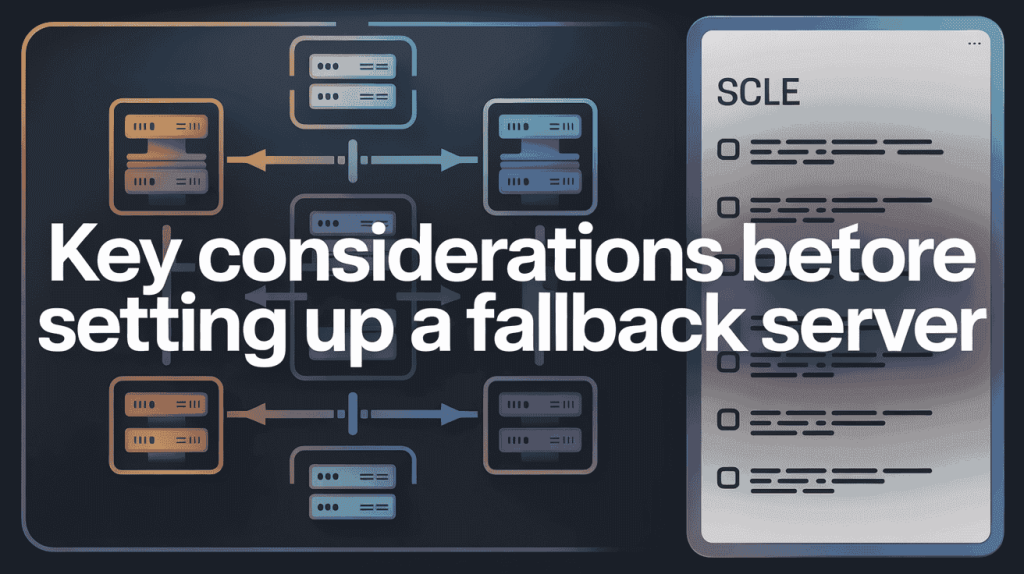
Key Considerations Before Setting Up a Fallback Server :
Before you jump into setting up a fallback server, there are several important factors to plan for. Thinking about these points first will save you a lot of time, money, and headaches later.
Here are the key considerations:
1. Data Synchronization (The Most Important Part)
This is the biggest challenge. Your fallback server is useless if it has old or no data. You need to ask:
- How will my data get from the main server to the fallback server?
- How “fresh” does the data need to be?
- Real-time (Replication): Does it need to be an exact copy, second-by-second? This is common for e-commerce checkouts or databases.
- Periodic (Backups): Is it okay if the data is a few hours old? This might be fine for a blog or a portfolio website.
The method you choose for syncing data will affect everything else.
2. How Will the “Failover” Actually Happen?
When your main server fails, how will your website traffic be rerouted to the fallback server? This “switch” needs to be planned. The most common methods are:
- Using a Load Balancer: This is like a smart traffic cop that detects the failed server and sends all traffic to the healthy one. This is usually the fastest and best method.
- Using a Floating IP: This is a special IP address that you can instantly move from your main server to your fallback server.
- Changing DNS: This involves updating your website’s DNS records to point to the new server’s IP. This is the slowest method and can take minutes or even hours to update for everyone, so it’s generally not recommended for automatic failover.
3. Cost vs. Benefit
A fallback server is essentially a second set of computer resources. This costs money. You need to decide:
- How much money do you lose for every hour your site is down?
- Does that potential loss justify the cost of paying for a standby server that might only be used a few times a year?
- For a critical business, the answer is almost always yes. For a personal hobby blog, maybe not.
4. Testing Your Failover Plan
A fallback server that hasn’t been tested is a fallback server that doesn’t work. You must have a plan to regularly test your system.
- Can you manually trigger a failover to see if it works?
- Can you “pull the plug” on your main server (in a safe, simulated way) and confirm the fallback server takes over as expected?
- You should schedule these tests (e.g., once every few months) to make sure nothing has broken.
5. Physical Location
Where will your fallback server live?
- Same Data Center: This is easier and cheaper. It protects you from hardware failure (like your main server breaking).
- Different Data Center (Geographic Redundancy): This is more secure. It protects you from larger disasters like a fire, flood, or power outage that takes down the entire data center.
Step-by-Step Guide to Setting Up a Fallback Server :
Setting up a fallback server involves careful planning and configuration. Here is a general step-by-step guide to get you started.

Step 1: Provision Your Fallback Server
First, you need to get your second server. This will be your fallback server.
- This server should ideally have the same (or very similar) specifications as your main server. This includes CPU, RAM, and storage space.
- You can set this up as a virtual server (VM) in the cloud (like on AWS, Google Cloud, or DigitalOcean) or as a separate physical machine.
- Best Practice: For true disaster recovery, this new server should be in a different physical location or “data center” than your main server. This protects you if the entire data center has a problem (like a power outage).
Step 2: Install and Configure the Server Environment
Your fallback server needs to be a software clone of your main server.
- Install the exact same operating system (e.g., Ubuntu 22.04, AlmaLinux).
- Install all the same software your application needs, such as your web server (e.g., Nginx or Apache), your database (e.g., MySQL or PostgreSQL), and any programming languages (e.g., Node.js, PHP).
- Copy over all your application files and website code.
Step 3: Set Up Data Synchronization
This is the most critical and often the most complex step. Your fallback server is useless if it has old data.
- For Files (like user uploads, images, etc.): You need to constantly copy files from your main server to your fallback server. A common and simple tool for this is
rsync, which can be set up to run every few minutes to “sync” any changes. - For Databases (where user info, posts, etc. are stored): You need to set up “replication.” Most database systems (like MySQL) have a built-in feature for this. You configure your main database as the “primary” and the fallback database as the “replica.” The primary database will then automatically send a copy of every single change (new user, new purchase, etc.) to the replica in real-time.
Step 4: Configure the Automatic Failover Mechanism
You need a system that can detect the failure and redirect the traffic. This is almost never done with DNS, as it is too slow.
The two best methods are:
- Method 1: Use a Load Balancer (Recommended) A load balancer is a server that sits in front of both your main and fallback servers. It constantly sends a “health check” (like a heartbeat) to both. The moment it detects your main server is “unhealthy,” it automatically stops sending traffic to it and sends 100% of the traffic to your healthy fallback server. This is the fastest and most reliable method.
- Method 2: Use a Floating IP (Simpler) A “floating IP” (or “virtual IP”) is an IP address that is not permanently tied to one server. You can use a script to automatically move it from one server to another. You can set up a script that monitors your main server. If the script sees that the server is down, it runs a command to instantly re-assign the floating IP address to your fallback server, which then takes over.
Step 5: Test, Test, and Test Again
A fallback system that you have not tested is a system that will not work when you need it.
- Once everything is set up, you must test it. The best way is to simulate a real failure.
- Manually turn off your main server (or just stop the web server software like Nginx).
- Watch what happens. Does your website stay online? Does the load balancer redirect traffic? Does the floating IP move correctly? How long does it take?
- Fix any problems you find. You should schedule these tests regularly (e.g., once every few months) to make sure your fallback plan is always ready.
By following these steps, you can create a strong safety net to ensure your website or service stays online, even when problems happen.
Owrbit’s Lifetime VPS: One Payment. Zero Monthly Bills. Forever
This is where Owrbit changes the game with our special Lifetime VPS.
It’s a simple idea: you make one single payment, and the server is yours to use for life. No more monthly bills, no more renewal fees, and no more worrying about your price going up.

This isn’t just a temporary discount. It’s a completely different way to think about hosting. You are not “renting” your server space anymore. You are “owning” your spot on the web, securing it for the long term.
The Obvious Win: How Much Money You Will Save
Let’s talk about the biggest benefit—the incredible long-term savings.
Think about what you pay for your server right now. A decent monthly VPS can cost $10, $20, or even more, every single month.

- At $15 a month, you pay $180 every year.
- In five years, that’s $900.
- In ten years, that’s $1,800… and the bills keep coming.
With the Owrbit Lifetime VPS, you pay one time. Let’s say that one-time payment is similar to what you’d pay for just one or two years of a normal subscription. After that break-even point, your hosting costs drop to zero. Forever.
Every month that goes by, the money you aren’t paying is money you’re saving. It’s a one-time investment for a lifetime of value.
After the first year or two, your server is effectively paying for itself, forever.
More Than Just Savings: Get Full Control and Peace of Mind
Beyond the money, a Lifetime VPS gives you true freedom.
A lifetime server isn’t just a good deal; it’s a better way to host. You’re not just getting a cheap plan—you are getting a full Virtual Private Server (VPS). This means you have total control. You get root access, so you can install any software you need. You can host multiple websites, run a game server, set up a private cloud storage, or just have a secure place to test your code.

But the biggest benefit is the peace of mind.
Think about it: no more renewal deadlines. No more panicking that your credit card on file expired and your site is suddenly offline. No more surprise emails telling you that your “special introductory price” is over and your monthly bill is doubling.
You set it up once, and it’s simply yours. Your projects have a stable, permanent home on the web.
You get all the power of a normal VPS, but without the stress of the next bill.
What Does “Lifetime” Really Mean? (Owrbit’s Clear Promise)
We know “lifetime” is a big promise, so we want to be completely clear about what it means.
This is not a gimmick. “Lifetime” simply means your server is valid for the entire life of the customer.

How can we offer this? It’s simple. Unlike other companies that build their whole business on charging you every month, we’ve structured this as a long-term investment for both of us. You pay a one-time fee that covers the hardware and our costs, and in return, we get a happy, loyal customer for life.
We are building a business for the long haul, and we want you to be a part of that journey. As long as the customer is operating, your lifetime server will be online and waiting for you.
We are committed to providing you with a reliable, long-term home for your projects.
Ready to Ditch Your Monthly Bill for Good?
Stop wasting money on hosting rentals every single month.
It’s time to make a one-time investment in your online future and get true peace of mind. Owning your server is easier than you think, and you can get started right now.
Here’s how to get your Lifetime VPS:
- Visit Our Website: Go to Lifetime VPS – One-time Payment VPS to see the plans.
- Choose Your Plan: Pick the Lifetime VPS package that has the right amount of RAM, CPU, and storage for your projects.
- Check Out Securely: Complete the simple, one-time payment.
- Get Your Server: Your server details will be sent to you, and you’ll be ready to go—for life.
That’s it. No more monthly bills. No more renewal dates. Just one payment, one time.
Get your Owrbit Lifetime VPS today and take control of your hosting future.
Common Challenges and Troubleshooting Tips :
Here are some common challenges you might face when setting up a fallback server, along with troubleshooting tips.
- Challenge: Data is Out-of-Sync
- Symptom: The fallback server takes over, but it’s missing the latest data. New user signups, recent posts, or transactions are gone.
- Troubleshooting:
- Check Replication Status: Your database (like MySQL or PostgreSQL) has built-in tools to check the status of replication. Look for errors or a growing “lag” time.
- Verify File Sync: For file uploads (like images), check the logs of your sync tool (like
rsync). Ensure the automated task (cron job) is actually running and has the correct permissions to read/write files. - Check Network: A high-latency or unstable network connection between your servers can cause data sync to fall behind.
- Challenge: “Split-Brain” Scenario
- Symptom: The network connection between the two servers fails, but both servers are still “online.” Both servers think they are the “active” one and start trying to serve traffic and write data. This leads to massive data corruption and conflicts.
- Troubleshooting:
- Use a Quorum: This is the best fix. In a cluster of servers, you set it up so that a server can only become “active” if it can communicate with the majority (the “quorum”) of other servers. In a simple two-server setup, you must have a third, lightweight “witness” or “arbitrator” server. If a server loses connection to the other two, it gives up its “active” status.
- Check Heartbeat Network: Ensure your “heartbeat” (the check-in signal) uses a reliable and, if possible, separate network path so it’s not affected by normal traffic spikes.
- Challenge: Failover Doesn’t Happen (or is very slow)
- Symptom: The main server goes down, but the fallback server never takes over, and your website is offline. Or, it takes 10+ minutes to switch.
- Troubleshooting:
- Check Health Check Settings: Your load balancer or monitoring script might be too “patient.” Check the
timeoutandretrysettings. A good setup might be to check every 3 seconds and trigger a failover after 3 failed checks (a 9-second total detection time). - Avoid DNS Failover: If your failover plan is to “change the DNS record,” this is your problem. DNS changes are slow and can take hours to update globally. Use a Load Balancer or Floating IP for instant switches.
- Test “Cold Boot”: Is your fallback server a “cold standby”? The time it takes for the server to boot up and start all its services (web server, database) might be the cause of the slowness.
- Check Health Check Settings: Your load balancer or monitoring script might be too “patient.” Check the
- Challenge: Fallback Server Fails Immediately (Throttling)
- Symptom: The failover happens, but the fallback server is instantly overwhelmed by the sudden rush of 100% of your website’s traffic and crashes.
- Troubleshooting:
- Use Active-Active: The best solution is an active-active setup where the fallback server is already “warmed up” and handling 50% of the traffic.
- Check Specs: Your fallback server must have the same (or very similar) CPU, RAM, and network capacity as your main server. A small, cheap server can’t handle the load of a large, busy one.
- Check Resource Limits: Make sure the fallback server doesn’t have lower resource limits (like database connection limits or firewall rules) that are choking the traffic.
- Challenge: Failback (Returning to normal) Causes a Second Outage
- Symptom: You fix the main server and switch traffic back to it. This “failback” process is slow, or you realize the main server has old data, causing another outage.
- Troubleshooting:
- Reverse Sync: Before you fail back, you must reverse your data replication. The fallback server (which is now the “active” one) must copy all the new data it received back to the original main server.
- Manual Failback: Never automate the failback process. Always do it manually during a planned, low-traffic maintenance window.
- Test the Original Server: Before failing back, run all your tests on the repaired main server to ensure it’s truly 100% healthy.
Being aware of these common challenges will help you build a more robust and reliable fallback system.
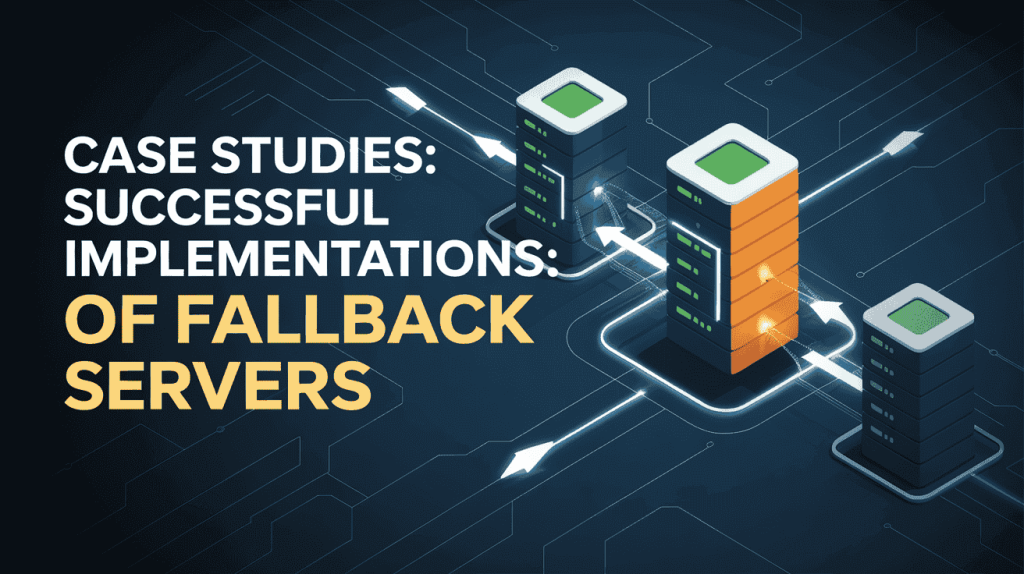
Case Studies: Successful Implementations of Fallback Servers
Here are some accurate case studies that show how different organizations have successfully implemented fallback server systems.
Case Study 1: Netflix (A Cloud-Native “Active-Active” Model)
Netflix is a prime example of a complex, large-scale fallback system. Instead of having one main server and one “backup” server, Netflix’s entire architecture is designed for failure, meaning any part can fail without affecting the user.
- The Challenge: To stream video to hundreds of millions of users globally without interruption, even if entire data centers fail.
- The Fallback Implementation:
- Architecture: Netflix runs on Amazon Web Services (AWS) and uses a “microservices” architecture. This means instead of one giant application, Netflix is hundreds of small, independent services (like one for search, one for billing, one for streaming).
- Technique (Active-Active): They use an “active-active” model. They run their services across multiple, physically separate “Availability Zones” (data centers). All of these zones are “active” and serving users at the same time, thanks to load balancers that distribute traffic.
- The Failover: If one entire data center (Availability Zone) goes offline, the load balancers instantly detect this. They automatically stop sending traffic to the failed zone and redirect it to the healthy ones. This is a seamless, automatic fallback that users never even notice.
- Key Tool (Chaos Monkey): To ensure this system works, Netflix famously created a tool called “Chaos Monkey.” This tool intentionally and randomly shuts down their own production servers. This constant, real-world testing forces their engineers to build resilient systems that can handle failure at any moment.
Case Study 2: A Financial Services Firm (A Traditional “Active-Passive” Cluster)
For industries like finance, regulations require that systems meet strict availability agreements (SLAs) and that data is never lost.
- The Challenge: A securities trading firm needed to ensure its critical Oracle database and Red Hat Linux application stack were always online to meet its availability SLAs.
- The Fallback Implementation:
- Architecture: The firm used a traditional two-server setup, often called a “failover cluster.”
- Technique (Active-Passive): They had one “active” server handling all the live database transactions. A second “passive” (fallback) server was kept on hot-standby, with all data being replicated from the active server to the passive one in real-time.
- The Failover: The system used specialized clustering software (like SIOS Protection Suite) to constantly monitor the entire application—the network, the storage, the OS, and the database. If this monitor (or “heartbeat”) detected any failure on the active server, it would automatically trigger a failover. This process promoted the passive server to become the new active server and redirected all connections to it, often in less than a minute.
Case Study 3: An Online Gaming Company (A Hot-Standby for 100% Uptime)
Online gaming companies face massive, sudden traffic spikes and have zero tolerance for downtime, as it directly impacts player experience and revenue.
- The Challenge: A game provider needed to support 8,000-10,000 simultaneous players with a 100% uptime requirement.
- The Fallback Implementation:
- Architecture: The company set up a fully redundant infrastructure. This included two load balancers (to manage traffic), multiple web servers, and a database server.
- Technique (Active-Passive / Hot-Standby): They created an exact replica of this entire setup. This second, identical setup acted as the fallback system.
- The Failover: The two systems were connected with real-time data mirroring. If the primary set of load balancers, web servers, or the database server failed, the system was configured to automatically failover to the “hot-standby” replica. Because the replica was identical and had all the latest data, it could take over the full workload instantly, ensuring players were not disconnected.
Conclusion: Ensuring Business Continuity with Fallback Servers
A fallback server, and the automatic server failover it provides, is the difference between a temporary problem and a complete disaster. It acts as a powerful safety net that protects your revenue, safeguards your customer’s trust, and ensures your business can continue to operate even when things go wrong.
From simple website hosting to complex applications, implementing a fallback server is a core part of any serious business continuity plan. It’s the practical, necessary step you take to ensure that your service is always available for your customers when they need you.
Ultimately, a fallback server is not just a technical extra; it’s a fundamental investment in your business’s resilience and long-term success.
Discover more from Owrbit
Subscribe to get the latest posts sent to your email.