


Are you tired of your hosting bill increasing every month? You’re not alone. Ever since the VMware price shock in 2025, thousands of businesses have been pushed into expensive subscriptions after Broadcom removed perpetual licenses. At the same time, cloud VPS platforms like DigitalOcean and AWS keep charging extra for every small feature — backups, snapshots, bandwidth, egress fees, and even basic scaling. If you run more than a few virtual machines, the cost rises fast.
Cloud costs rise every year because you pay for convenience, not ownership.
This is why many companies are now looking for a simpler, more affordable way to Host Multiple VPS without dealing with these pricing traps. Proxmox VE has become a strong VMware Alternative for 2025 and beyond. It gives you full control, clean performance, and the freedom to run many VMs and containers from one physical machine.
But here’s the part most people miss: Proxmox only works the right way on real bare-metal hardware. It cannot deliver full performance or stability on a typical cloud VPS. That’s why a Proxmox Dedicated Server from Owrbit becomes the perfect exit strategy. You get powerful hardware, predictable pricing, and the flexibility to build your own private cloud — while keeping costs far lower than commercial virtualization platforms.
In this guide, you’ll learn how to use Proxmox to run multiple VPS on a single dedicated server, cut hosting costs, and gain full control over your infrastructure in 2025 and 2026.

Cost Wake-Up Call: Cloud VPS vs Owrbit Dedicated Server
Most teams move to the cloud thinking it will save money. But when you scale to just a few virtual machines, the monthly bill becomes a shock. Before you build your setup or choose a VMware Alternative, it’s important to understand the real cost of hosting your workloads.
Here’s the simple comparison:
A single dedicated server can replace an entire rack of small VPS instances.
| Setup | What You Get | Monthly Cost | What’s the Catch? |
|---|---|---|---|
| 5 x 8GB Cloud VPS | Shared CPU, average performance, extra fees for backups and bandwidth | $200/month | Slow during peak hours, noisy neighbors, unpredictable costs |
| 1 x 64GB Owrbit Dedicated Server | Dedicated CPU, full hardware control, unmetered bandwidth | $100/month | None — ideal for running Proxmox and hosting multiple VPS |
When you rely on cloud VPS providers, you’re paying a premium for shared hardware and add-on charges. Every extra feature becomes another line on your bill.
With an Owrbit Dedicated Server, you keep complete control of your resources. You install Proxmox once, and from that point on, you can Host Multiple VPS without extra fees, performance drops, or surprise invoices.
It’s a simple truth: stop paying rent. Start owning the building.
Your infrastructure becomes faster, cheaper, and fully under your control.
What Is Proxmox VE?
Proxmox VE, or Virtual Environment, is a free and open-source operating system made for running virtual machines and containers. Think of it as the control center for your entire server. Instead of running apps like a normal Linux or Windows system, Proxmox is built to run other computers inside your server.
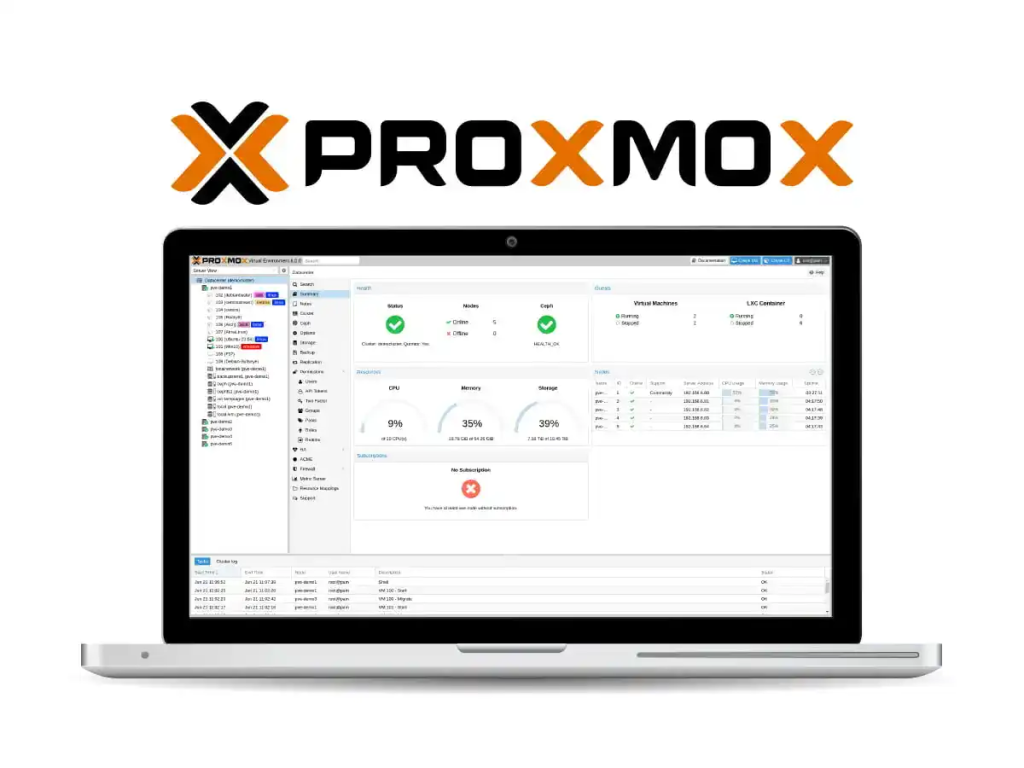
This is what makes it different. Proxmox is a Type 1 hypervisor, which means it runs directly on the physical hardware. There’s no middle layer, no extra software slowing things down. When you install it on an Owrbit server, it talks straight to the CPU, memory, disks, and network — giving you the best performance for hosting multiple VPS at the same time.
Proxmox is not an app — it’s the platform your apps run on.
If you want an easy, fast, and flexible way to manage your own private cloud, Proxmox is one of the most reliable choices available today.
The Real Reason Proxmox Needs Bare Metal (Not a VPS)
If you want Proxmox to run fast, stable, and reliable enough to Host Multiple VPS, you need direct access to hardware. Cloud VPS machines are not built for this. Here’s the clear breakdown of why bare metal wins every time.

1. The Technical Barrier: The “Russian Doll” Problem
Running Proxmox inside a VPS is like stacking boxes inside each other. Everything becomes tight and slow.
• You are running a virtual machine inside another virtual machine.
• This is called nested virtualization, and most cloud providers block it.
• Even when it works, performance drops by nearly half.
• The host system and your Proxmox guest system fight for CPU instructions.
Bare metal removes all the layers. Proxmox talks straight to the hardware, giving you full speed and full features.
2. The Performance Killer: The “Noisy Neighbor” Effect
Cloud VPS plans put you on shared hardware with dozens of other users.
• If another customer on the same machine gets high traffic, your CPU slows down.
• This slowdown is called CPU steal.
• It causes lag, VM freezing, and bad performance during peak hours.
On an Owrbit Dedicated Server, you own the full CPU.
• A Ryzen 9 on bare metal is yours alone, 24/7.
• No neighbors.
• No sharing.
• No performance surprises.
3. Hardware Access: Full Control (Even If You Break Something)
On a cloud VPS:
• If you mess up the firewall or network, you’re locked out.
• You can’t access the boot menu.
• You can’t fix the OS if it crashes.
• Your only option is to delete and recreate the server.
On Owrbit Bare Metal:
• You get IPMI / KVM over IP console access.
• You can manage the server as if you’re sitting in front of it.
• Fix networking mistakes, kernel issues, or broken updates easily.
• Total control at the hardware level.
4. Resource Efficiency: RAM Is Your Most Valuable Asset
Proxmox needs around 2GB RAM for itself.
On Cloud VPS:
• Buying an 8GB VPS just to spare 2GB for Proxmox is expensive.
• You end up paying high monthly fees just to maintain overhead.
On Bare Metal:
• Owrbit servers start at 64GB or 128GB RAM.
• Giving 2GB to Proxmox is nothing.
• You get huge capacity to run many VMs with zero waste.
Bare metal is not just faster — it is smarter, cheaper, and far more reliable for serious Proxmox deployments.
How to Choose and Order the Perfect Owrbit Server for Proxmox
Before you Host Multiple VPS or migrate away from VMware, you need the right foundation — a reliable, high-performance Proxmox Dedicated Server. This guide walks you through choosing the right hardware, configuring it correctly, and understanding the provisioning process so everything goes smoothly.
High clock speed helps everything feel faster, from websites to Light VM workloads.
Check the difference at NVMe vs SATA SSD: What’s the Real-World Difference?
Step 1: Pick Your Power Plant (Choosing the Right Specs)
Your entire private cloud will run on this machine, so choosing the right specs is important. But don’t worry — here’s a simple way to choose without overthinking it.
For beginners or small deployments
Pick a Ryzen-based server.
• High clock speed = better performance for game servers, websites, and general workloads.
• Great balance of performance and price.
• Ideal for 10–30 VMs or mixed workloads.
For professionals or heavy workloads
Pick an EPYC or Xeon model.
• Designed for massive parallel tasks.
• Perfect for 50+ VMs, big databases, analytics workloads, or multi-tenant setups.
The golden rule
Always prioritize RAM.
Proxmox uses RAM for everything — caching, VM operations, and smooth multitasking.
For a healthy environment, aim for at least 64GB RAM. This gives you room to grow and prevents slowdowns as you add more virtual machines.
Step 2: Navigating the Owrbit Server Configurator
Once you’re on the checkout page, you’ll see several customization options. Here’s how to set everything up correctly for a Proxmox Dedicated Server.
Operating System (Most Important Setting)
• If you see “Proxmox VE” in the OS list, choose it directly.
• If not, select “Ubuntu 22.04” or “Ubuntu 24.04” and add a note:
“Please install Proxmox VE.”
This ensures the server arrives ready for virtualization.
Storage Selection
Choose NVMe SSDs.
• Virtual machines depend heavily on disk speed.
• Old HDD drives will feel painfully slow.
• NVMe makes your entire setup feel instant and responsive — from boot times to database queries.
Other tips
• Avoid over-customizing. Start simple and scale later.
• Add extra IPs if you plan to assign public IPs to multiple VMs.
Step 3: Bandwidth & Location Strategy
Pick the server location closest to your users, not yourself.
If your customers are in Europe, choose the Germany location.
If your audience is in Asia, choose the Singapore/India region.
This reduces latency and makes everything feel faster for your users.
Bandwidth
Running your own cloud environment consumes a lot of data.
Most providers charge extra for bandwidth — and it adds up fast.
Owrbit gives you unmetered bandwidth, which means:
• No surprise charges
• No throttling
• Perfect for large VM clusters, backups, containers, and file transfers
This is a huge advantage when building a self-hosted Proxmox environment.
Step 4: Understanding Provisioning Time (The Realistic Wait)
Unlike a shared VPS that starts instantly, a Dedicated Server is a physical machine.
A real technician prepares it, installs your OS, and connects it to the network.
Typical delivery time: 24–48 hours.
This is a good thing — it means your hardware is being properly set up, tested, and secured before it becomes your private server.
You aren’t renting a tiny piece of a shared computer.
You’re getting your own power plant.
Once your Owrbit server is ready, you’ll receive:
• Full root access
• IPMI/KVM console credentials
• Your installed OS (Proxmox VE or Ubuntu ready for Proxmox setup)
• The ability to immediately start deploying VMs, containers, and private cloud workloads
Getting started with Proxmox becomes much easier when you choose hardware designed for it. With the right Owrbit Dedicated Server, you have the speed, the control, and the flexibility needed to build your own reliable private cloud.
Set Up Proxmox (Step-by-Step) on a Dedicated Server
This hands-on tutorial shows exactly how to Host Multiple VPS on a single Proxmox Dedicated Server. Follow these steps in order — they assume you have a clean Owrbit bare-metal server (Clean OS install) ready to use. Wherever possible I include simple commands and practical tips. Keep the primary goals in mind: stability, density, and predictable performance.
Fast NVMe storage is the secret ingredient for responsive VMs.

Quick checklist before you start :
- Owrbit Dedicated Server with at least 64GB RAM, CPU with virtualization flags (VT-x/AMD-V), and either NVMe or fast RAID disks.
- Clean OS install or Proxmox ISO ready. (Owrbit offers Clean OS installations tuned for Proxmox.)
- IPMI / KVM access enabled in the control panel.
- SSH key pair ready for root access.
- Brief network plan (public IPs, VLANs, gateways) and backup target (remote NFS, SMB, or Proxmox Backup Server).
Step 1 — Prepare the hardware (BIOS & firmware)
- Boot into BIOS/UEFI.
- Enable virtualization: Intel VT-x or AMD-V, and IOMMU (VT-d / AMD-Vi) for passthrough.
- Update firmware if available (BIOS/UEFI & RAID controller).
- Ensure IPMI/KVM is enabled so you can recover the server if networking breaks.
Why: enabling IOMMU lets you do PCIe passthrough later and gives Proxmox full access to hardware — a must for a true Proxmox Dedicated Server.
Step 2 — Install Proxmox (clean, bare-metal install)
Option A — Use the Proxmox VE ISO (recommended):
- Download the Proxmox VE ISO and boot the server from it (use IPMI virtual media).
- Follow installer: choose target disk (ZFS recommended for NVMe or mirrored storage), set a static management IP, set hostname, set root password and SSH key.
- Reboot and log in to the web UI at https://<management-ip>:8006.
Option B — Use Owrbit Clean OS and repository install:
- If you prefer Debian first, install Debian 12/13 minimal, then follow Proxmox repository install steps (official docs).
- Keep the machine minimal — no cloud-agent, no extra control panels.
Why: installing directly on bare metal gives better I/O, reliable VM density, and full access to Proxmox features that fail under nested virtualization.
Step 3 — Basic Post-Install Settings
- Login to web UI: https://<your-ip>:8006 (accept self-signed cert for first login).
- Upload your SSH public key to root.
- Configure Datacenter → DNS and NTP.
- Create a backup user or integrate with LDAP/AD if needed.
Commands (SSH):
# update host
apt update && apt full-upgrade -y
Step 4 — Networking: bridge setup and tenant isolation
Goal: give VMs public or private networking without exposing host services.
- Create a Linux bridge (vmbr0) that binds to your physical NIC and assigns the management IP.
- Use additional bridges or VLANs for tenant isolation (vmbr1, vmbr10.20 for VLAN 20).
- For multi-tenant isolation, use Linux bridges + VLAN tagging or create Open vSwitch if you need advanced flows.
Example /etc/network/interfaces excerpt (Debian-style):
auto vmbr0
iface vmbr0 inet static
    address 203.0.113.10/24
    gateway 203.0.113.1
    bridge-ports eth0
    bridge-stp off
    bridge-fd 0
Tips:
- Put management and tenant traffic on separate VLANs/bridges.
- Use Owrbit’s control panel to assign extra public IPs to your server, then add them to Proxmox or route via NAT.
Step 5 — Storage: choose the backend
Options and when to pick them:
- ZFS (recommended for NVMe/RaidZ): copy-on-write, checksums, snapshots, good for many small VMs.
- LVM-thin: high density, fast for raw block devices.
- Directory (ext4/xfs): simple, OK for small labs.
- Ceph or external SAN: for multi-node clusters requiring HA.
Quick example: create a ZFS pool
zpool create -f -o ashift=12 rpool mirror /dev/nvme0n1 /dev/nvme1n1
zfs create rpool/data
Best practice: dedicate fast NVMe devices to the VM datastore, use slower HDDs for cold backups or archives.
Step 6 — Tuning the host for density and stability
- Reserve memory: give Proxmox itself 2–4GB (set in
pvesettings). - Disable unnecessary services (cloud-init, GUI) on host.
- Set vm.swappiness low for VMs:
sysctl -w vm.swappiness=10
- Enable hugepages and CPU isolation for latency-sensitive VMs (database, real-time apps).
- Decide on KSM (Kernel Samepage Merging) only if your workload benefits from memory deduplication — test first.
Keyword tip: these tuning steps help you Host Multiple VPS reliably on a single Proxmox Dedicated Server.
Step 7 — Create your first VM and container
- In the Proxmox web UI: Create → VM. Choose ISO, assign CPUs, memory, disk.
- Use cloud-init for automated guest provisioning if you run many VMs.
- For lighter workloads, use LXC containers (Create → CT), which are more efficient than full VMs.
Recommended resource plan for density:
- Standard web app VM: 2 vCPU, 4GB RAM.
- Small database sandbox: 4 vCPU, 8GB RAM.
- Containers for dev/test: 1 vCPU, 1–2GB RAM each.
Always set CPU and memory limits and use ballooning carefully. Overcommit CPU (vCPUs > physical cores) is OK in many cases; overcommit RAM is risky.
Step 8 — Advanced: passthrough, pinning, and limits
- PCIe passthrough (for GPUs or NICs): ensure IOMMU is enabled and add
hostpci0to VM config. - CPU pinning for performance-critical VMs:
qm set <vmid> --numa 1
qm set <vmid> --cpu host
- Set
cgrouplimits to avoid a single VM starving others.
These are the exact controls that make Proxmox a true VMware Alternative for shops that need fine-grained control.
Step 9 — Backups and snapshots (protect your data)
- Use scheduled backups (Datacenter → Backup). Choose snapshot or stop mode depending on guest type.
- For enterprise-grade backup, use Proxmox Backup Server (fast, deduplicated) or push backups to an offsite NFS.
- Keep daily incremental and weekly full backups; test restores regularly.
Example vzdump schedule:
- Daily incremental at 02:00 (retain 7 days)
- Weekly full on Sunday (retain 4 weeks)
Step 10 — High-availability and clustering (optional)
- For failover across multiple Owrbit Dedicated Servers, create a Proxmox cluster:
pvecm create my-cluster
pvecm add <node-ip>- Configure corosync and quorum.
- Use fencing (IPMI) to ensure split-brain protection. Owrbit’s IPMI access is critical here.
Note: HA requires shared storage (Ceph or NFS) or replicated ZFS and a minimum of 3 nodes for production-grade clusters.
Step 11 — Security hardening
- Change default ports and disable password SSH for root — use SSH keys.
- Enable two-factor authentication on the Proxmox web UI.
- Use the built-in Proxmox firewall per-host and per-VM. Add host-level iptables / nftables as needed.
- Install fail2ban and keep the host patched:
apt update && apt upgrade -y. - Limit API access via VPN or allowlist management IPs only.
Security checklist: patch regularly, restrict management plane to trusted networks, encrypt backups in transit.
Final checklist before going live
- Management access secured (SSH keys, IPMI, 2FA).
- Backup and restore tested.
- Monitoring alerts configured for CPU steal and disk latency.
- Network isolation (VLANs/bridges) validated.
- Resource quotas set to avoid noisy-tenant issues.
If you want to skip the fiddly parts and deploy faster, Owrbit’s Dedicated Servers come with clean OS installs, IPMI/KVM access, and unmetered bandwidth — a battle-tested platform for running Proxmox as a true VMware Alternative. Choose a Proxmox Dedicated Server from Owrbit and you’ll have everything you need to Host Multiple VPS with predictable performance and lower total cost of ownership.
Networking 101: How to Assign Static IPs & Build a Perfect Bridge Setup
Networking is the part where most people get stuck when setting up a Proxmox Dedicated Server. The good news is that once you understand the basics of bridge mode, assigning a specific public IP to a specific VM becomes simple.
Think of vmbr0 as the digital switch that connects all your VMs to the internet.

How Bridge Mode Works
Think of a Linux bridge in Proxmox as a virtual network switch.
• Your dedicated server’s physical network port connects to the bridge.
• Every VM you create plugs into that same bridge.
• Each VM can then receive its own public IP, just like a real server.
This setup allows you to Host Multiple VPS on one machine without complicated routing.
Assigning a Public IP to a VM (Simple Steps)
Here’s the clean workflow:
- Create or use the main bridge (usually vmbr0).
- Attach your physical NIC (eth0) to vmbr0.
- Set the host’s static IP on vmbr0 (not on eth0).
- Edit the VM’s network settings and attach it to vmbr0.
- Inside the VM, manually assign the public IP, gateway, and subnet mask provided by Owrbit.
Each VM behaves like its own independent server on the internet.
Need More IPs? Owrbit Makes It Easy
If you have different projects — SaaS tools, client apps, internal testing environments — you can give each VM its own public identity. Owrbit allows you to request additional IPv4 and IPv6 addresses anytime. Just add the IP to your server in the control panel, then assign it to the VM using the bridge method above.
Clear, stable networking is one of the biggest advantages of running your infrastructure on a Proxmox Dedicated Server instead of a cloud VPS. You get full control, predictable routing, and the ability to scale your IP space as your projects grow.
A Simple Guide to Moving Your VMs to Proxmox
Many businesses are moving away from VMware after the 2025 price hikes, and searches for “Migrate ESXi to Proxmox” have exploded. The good news is that switching doesn’t mean rebuilding your servers from scratch. With a Proxmox Dedicated Server from Owrbit, you can bring your existing Windows or Linux VMs with you using familiar export/import formats.
OVF import makes switching from VMware a matter of minutes, not weeks.
How Migration Works :
Proxmox supports importing OVF/OVA files, which are the standard export formats from VMware ESXi. This makes the transition smooth and predictable.
Steps to Move Your VPS:
- In VMware, export your VM as an OVA or OVF package.
- Upload the exported file to your Owrbit server or directly into Proxmox storage.
- Use Proxmox’s built-in import tool to convert the VM into a native Proxmox format.
- Adjust CPU, memory, and disk settings if needed.
- Boot the VM — it should run just like it did before, now using your Proxmox Dedicated Server’s full performance.
Why This Matters
You keep everything:
• Your configurations
• Your apps
• Your data
• Your OS
No rebuilding. No reinstalling. No downtime beyond the migration window.
The Owrbit Advantage :
Owrbit Dedicated Servers provide strong CPUs, fast NVMe storage, and unmetered bandwidth — making them ideal for large OVA file transfers and quick conversion times. Once your VMs are inside Proxmox, you get full control and predictable costs with none of VMware’s licensing pressure.
If you’re ready to escape VMware and move to a modern, open-source VMware alternative, Proxmox on Owrbit hardware gives you an easy exit path.
Frequently Asked Questions :
If you’re setting up a Proxmox Dedicated Server or planning to Host Multiple VPS, these are the most common questions people ask. Here are clear answers based on real user problems and industry best practices.
What are the minimum hardware requirements to run Proxmox?
Minimum basics: a 64-bit Intel/AMD CPU with virtualization support (VT-x/AMD-V), a network interface, and at least 2 GB RAM for the host itself. For real deployments and good VM density, start at 64 GB RAM, fast NVMe storage, and a CPU with virtualization/IOMMU support. Proxmox documentation recommends using quality server hardware for production.
How do I assign a public IP to a specific VM in Proxmox?
Use bridge mode. Create a Linux bridge (vmbr0) tied to the physical NIC, attach the VM’s network device to that bridge, then configure the public IP/gateway inside the VM. If you need multiple public IPs, request them from your provider (Owrbit can add extra IPs) and map each IP to the VM via the bridge. (Proxmox network docs explain bridge configuration.)
How do I migrate VMs from VMware ESXi to Proxmox?
You can export VMs from ESXi as OVF/OVA and import them into Proxmox using the built-in import tools or the Proxmox VE Import Wizard. The import converts disks and lets you reconfigure CPU/memory before first boot — so you usually avoid a full rebuild. This is the common path for teams escaping expensive VMware licensing.
How much RAM does Proxmox itself need, and how much should I reserve?
Proxmox needs about 2 GB for the host services in a small setup; plan 2–4 GB for the OS in production. Beyond that, always prioritize having plenty of RAM for guests — aim for at least 64 GB when you want to Host Multiple VPS densely and avoid frequent resizing. Proxmox & ZFS have additional memory needs if you use those features.
What is the best storage backend for many small VMs?
ZFS on NVMe is a top choice for many Proxmox users — it provides checksums, snapshots, and compression that benefit many small VMs. For very high density where raw performance matters, LVM-thin or direct NVMe volumes can work. For clusters and HA, Ceph is recommended but requires extra nodes and network design. (Choose based on performance vs. complexity tradeoffs.)
How should I back up Proxmox VMs reliably?
Use scheduled backups (Datacenter → Backup) and consider Proxmox Backup Server for deduplicated, efficient backups. Keep daily incrementals and periodic full backups, and always test restores. Off-site or remote backup targets protect you from physical server failure.
Can I run containers and full VMs together on the same Proxmox host?
Yes — Proxmox supports both KVM VMs and LXC containers. Use LXC for very lightweight workloads (dev/test, web frontends) and KVM for full OS isolation (Windows, specialized kernels). Mixing both helps you Host Multiple VPS efficiently and squeeze more value from one Proxmox Dedicated Server.
What networking/isolation should I use for multi-tenant or production setups?
Use separate Linux bridges or VLANs per tenant, and put management on its own VLAN. Combine bridge + VLAN tagging or Open vSwitch for advanced isolation. Always limit management access to trusted IPs and enable IPMI/KVM for rescue console access if you or the tenant misconfigure networking.
Is running Proxmox on a single Owrbit Dedicated Server cheaper than multiple cloud VPS?
In many cases — yes. Renting one 64+ GB Proxmox Dedicated Server and hosting many VMs on it often reduces monthly cost versus several small cloud VPS instances, removes per-feature fees (egress, snapshots), and gives you full hardware control. That’s the core idea behind cloud repatriation for teams who need predictable costs and performance. (Costs vary by provider and region; run your own comparison.)
These FAQs should help you avoid common mistakes and build a faster, more stable Proxmox environment. If you need the right hardware to support your setup, choosing an Owrbit Dedicated Server will give you the performance and control you need.
Build More, Spend Less: Your Private Cloud Starts Here
You’ve now seen how Proxmox turns a single dedicated server into a powerful, flexible platform where you can Host Multiple VPS without paying cloud-style prices. With one reliable machine, you can run development servers, client projects, internal apps, databases, containers, and even full production workloads — all with full control and no hidden fees.
This is the future of hosting. Instead of renting tiny slices of someone else’s hardware, you’re building your own private cloud, one that would easily cost $500/month on big providers. On a Proxmox Dedicated Server, you get the same power for a fraction of the cost while enjoying faster performance, direct hardware access, and predictable billing.
If you’re tired of rising VMware subscription fees, cloud provider add-ons, and shared CPU limits, now is the perfect moment to switch.
Ready to take control of your infrastructure and cut your monthly bill?
Explore Owrbit’s Ryzen Dedicated Servers and start building your private cloud today.
Discover more from Owrbit
Subscribe to get the latest posts sent to your email.


[…] How to Host Multiple VPS on Dedicated Server with Proxmox 2026 […]
Great guide on Proxmox for efficient VPS hosting—love the cost savings tip! Interestingly, we apply similar sustainability principles in remodeling with eco-friendly materials: 😊