

Being a business owner, having a professional email address that is directly linked to your domain is also important for every business. Zoho Mail provides a reliable and user-friendly email solution, but integrating it with a custom domain can sometimes be a bit tricky. That’s where Cloudflare DNS comes in.
Cloudflare DNS is a powerful tool that allows you to configure various DNS settings for your domain, including MX, TXT, and CNAME records. By properly setting up these records, you can ensure that your Zoho Mail account is running smoothly and efficiently.
In this guide by Owrbit, you will learn step-by-step how to configure Zoho Mail with a custom domain using Cloudflare DNS. Whether you’re a small business owner looking to professionalize your email communication or an individual wanting to stand out in a crowded inbox, this tutorial will help you maximize your email performance.

Introduction To Zoho Mail :
Zoho Mail is an email hosting provider that offers a free email hosting service with a forever free plan. With Zoho Mail, users can create custom and personal email addresses using a custom domain for the first single domain, providing a professional email experience. The hosting provider also allows users to send and receive email using a custom domain email addresses, as well as manage their email through a dedicated email client. Zoho Mail also offers a free trial for those interested in their email service.
Users can enjoy multiple email accounts with free email hosting and email delivery capabilities. Zoho Mail also provides features such as email aliases, email storage, email forwarding, and customizable email templates for email marketing. With Zoho Mail, users can use a custom domain to stay professional while accessing their emails through hosted email and shared email. The platform also offers paid hosting plans for those in need of more features and benefits.

Steps To Configure Zoho Mail DNS With Cloudflare DNS :
If you haven’t yet followed the steps for “Getting Free Custom Domain Email Hosting with Zoho Mail 2024,” please make sure to do so first using the link below. Many users have found the DNS mapping step with Cloudflare to be challenging, so let’s walk through it together.
Checkout Get Free Custom Domain Email Hosting By Zoho Mail 2024
- Login to your Cloudflare and select your website from below.
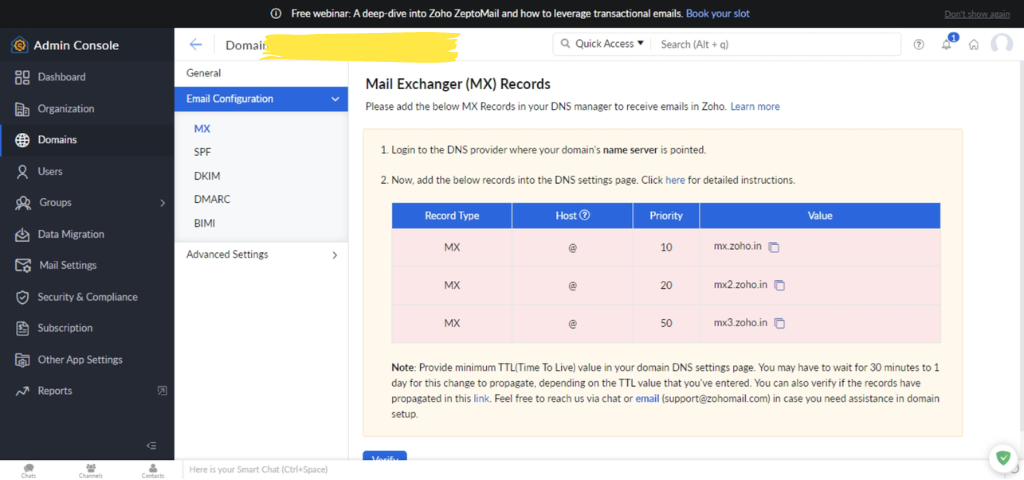
- Copy the following DNS Records provided by Zoho Mail in DNS Mapping.
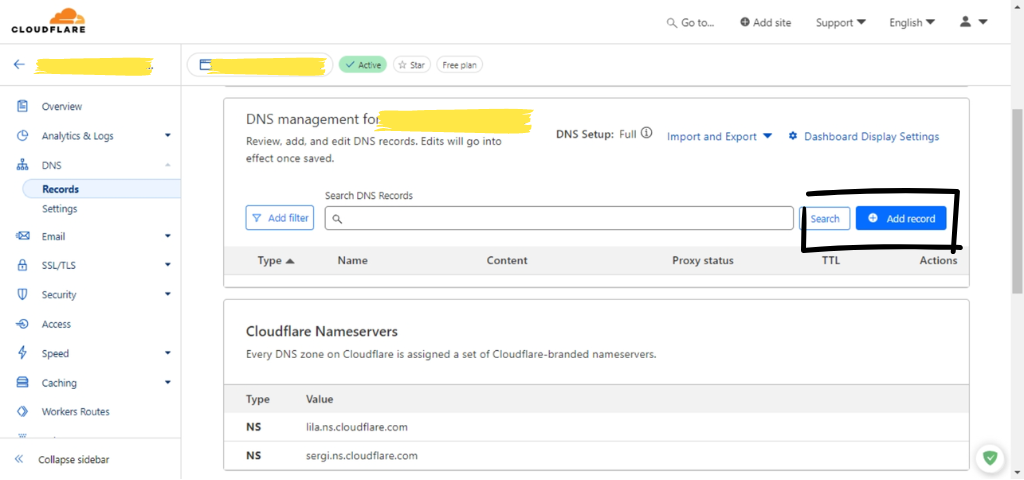
- Go back to Cloudflare dashboard and find DNS option in left sidebar.
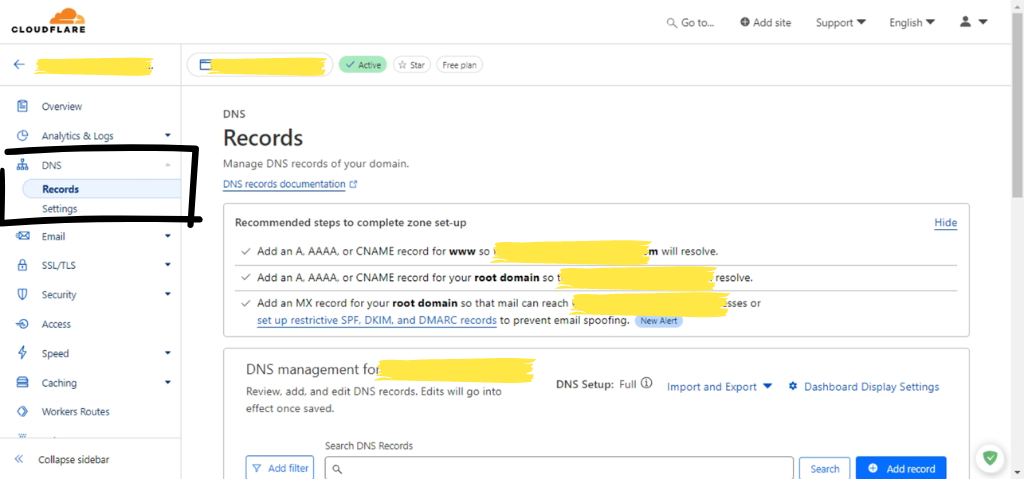
- Scroll down in DNS Records and click on Add records in the DNS management.
- In the Record type, Enter all the DNS Records as shown in below picture and click save after adding all the records.
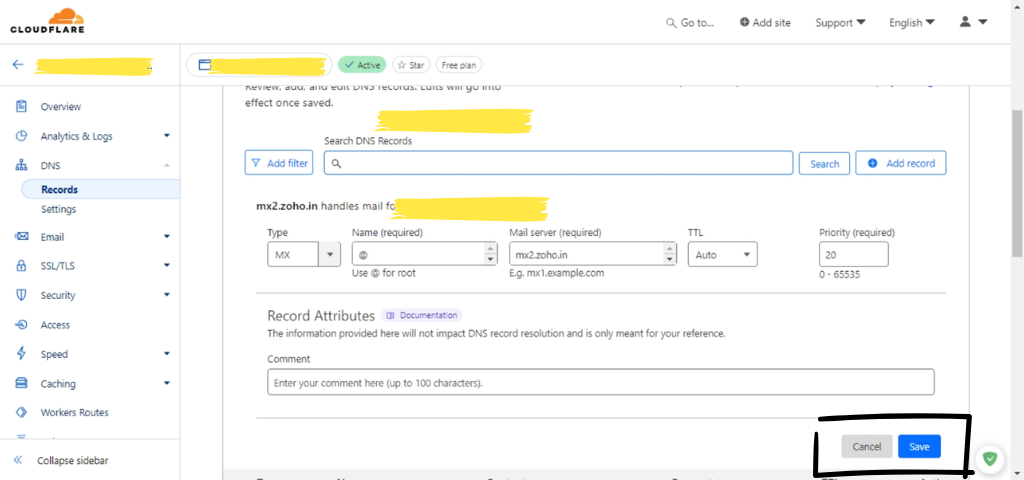
You have successfully entered all the DNS Records Of Zoho Mail In Cloudflare DNS.
Conclusion :
Configuring Zoho Mail with your custom domain using Cloudflare DNS might seem be difficult at starting, but by following these steps, you can set it up without any problem. Once you’ve added the all the necessary DNS records in Cloudflare, your Zoho Mail account will be fully integrated with your custom domain, giving your business a professional email presence. If you need to refer back to the steps or encounter any issues, you can always revisit this guide or check Zoho Mail’s support resources. With your email set up, you’re now ready to enjoy a seamless and efficient email experience for your business or personal use!
Checkout Setup Custom Nameservers for Resellers in DirectAdmin – Step-By-Step Guide 2024
Discover more from Owrbit
Subscribe to get the latest posts sent to your email.